
Interior paint prep tips can help homeowners create a cleaner, smoother, and longer-lasting finish before the first coat is applied. The right process includes cleaning dust and grease, repairing wall damage, sanding uneven areas, priming where needed, and protecting floors, trim, outlets, and nearby surfaces.
At BVL Painting & Carpentry, we help homeowners prepare interior walls so the final paint looks more even and performs better over time. A lasting finish begins with the condition of the surface, not only the paint color or product selected.
Explore our professional interior painting tips before planning your next room update.
Start With Clean Interior Walls Before Painting
Paint bonds better to clean, dry, and stable surfaces. Dust, grease, smoke residue, fingerprints, and cleaning-product buildup can interfere with adhesion and leave the finish looking uneven.
Begin by dusting the walls and vacuuming along baseboards, corners, and trim. Kitchens, bathrooms, entryways, and areas around light switches often need extra attention before repairs or primer are applied.
Areas That Often Need Extra Cleaning
- Walls above cooking and food-preparation areas
- Surfaces around switches and doorframes
- Bathroom walls exposed to moisture or products
- Baseboards and lower wall sections near flooring
- Corners where dust and cobwebs collect
Important: Let cleaned walls dry completely before repairing, sanding, priming, or painting.
Repair Wall Damage Before Applying Paint
Wall repairs should come after cleaning because bright lighting can reveal dents, nail holes, scratches, uneven patches, and failing paint. Marking each damaged area helps prevent missed spots before the finish coat goes on.
Small holes may need spackling compound, while larger defects may require joint compound or drywall repair. Recurring cracks, widening lines, water stains, and damaged drywall paper should be reviewed before they are covered.
Common Wall Problems to Fix First
- Nail and anchor holes
- Dents from furniture or doors
- Loose or peeling existing paint
- Cracks around windows and doorways
- Damaged drywall paper
- Water stains or moisture-related deterioration
For after-project care, review these long-term wall care recommendations.
Use This Interior Paint Prep Guide Before Work Begins
A clear preparation plan helps homeowners understand what each step does and why it matters. Skipping one stage can affect adhesion, texture, color consistency, or the final sheen.
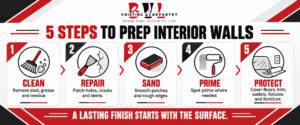
Interior Wall Preparation Checklist
| Prep Step | What to Do | Why It Matters |
|---|---|---|
| Clean the walls | Remove dust, grease, residue, and cobwebs. | Helps paint bond evenly to the surface. |
| Repair damage | Patch holes, cracks, dents, and drywall flaws. | Reduces visible defects after painting. |
| Sand uneven areas | Smooth patched areas and rough edges. | Helps repairs blend with the surrounding wall. |
| Prime where needed | Spot-prime repairs, stains, bare drywall, or glossy areas. | Improves coverage, adhesion, and sheen consistency. |
| Protect surfaces | Cover floors, trim, outlets, fixtures, and furniture. | Prevents paint splatter and keeps the work area organized. |
Sand Patched Areas for a Smoother Finish
Sanding smooths repairs, removes rough edges, and reduces differences between patched and existing surfaces. It does not mean every wall needs aggressive sanding.
Use a suitable fine-grit abrasive for light smoothing. Coarse sandpaper can leave scratches that remain visible beneath the new coating. Glossy existing paint may also need light abrasion to improve adhesion.
Important: Vacuum and wipe away sanding dust before applying primer or paint.
Know When Primer Is Actually Needed
Primer is useful, but it is not automatically required for every repaint. Clean, sound walls already coated in a similar color may only need localized priming.
Primer becomes more important when the surface has repairs, stains, bare areas, glossy coatings, or color changes that could affect coverage. The goal is to create a more consistent surface before the finish coat.
Primer Is Often Helpful When
- New or unpainted drywall is present
- Repairs absorb paint differently from surrounding areas
- The existing surface is glossy
- A dark color is being covered with a lighter one
- Stains or discoloration require blocking
- The wall has exposed material
- The previous coating has adhesion problems
Important: Primer should not be used to hide an unresolved leak or active moisture problem.
Protect Floors, Trim, Outlets, and Furniture
Protect the room after completing dusty preparation work. Move furniture away from the walls and cover anything that must remain inside. Drop cloths help protect flooring and create a cleaner work area.
Remove outlet and switch covers when it is safe to do so. Keep paint and moisture away from electrical components. Painter’s tape may be applied along trim, fixed hardware, and nearby surfaces that need protection.

Protection Should Include
- Flooring and floor transitions
- Baseboards, crown molding, and trim
- Doors, windows, and fixed cabinetry
- Light fixtures and hardware
- Outlets and switches
- Furniture remaining in the room
Avoid Common Interior Paint Prep Mistakes
Rushing interior painting preparation often creates defects that become more noticeable after the paint dries. Some problems may also appear later when the coating begins wearing, peeling, or showing uneven sheen.
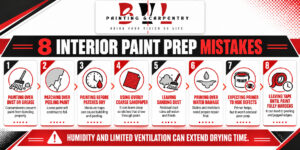
Preparation Mistakes to Avoid
- Painting over dust, grease, or cleaning residue
- Applying compound over unstable or peeling paint
- Painting before patches have dried completely
- Using sandpaper that leaves deep scratches
- Failing to remove sanding dust
- Priming over unresolved water damage
- Assuming primer will correct every surface defect
- Leaving tape on until the coating fully hardens
Important: Humidity and limited ventilation can extend drying times between cleaning, repairs, primer, and paint.
Gather the Right Prep Tools Before Starting
The necessary tools depend on the wall’s condition. A room requiring only cleaning and minor repairs needs fewer supplies than one with damaged drywall, stains, or failing paint.
Basic Prep Tools May Include
- Microfiber cloths and a vacuum
- Mild cleaning solution and clean water
- Putty knives in several sizes
- Spackling or joint compound
- Fine-grit sanding materials
- Dust mask and protective eyewear
- Painter’s tape and drop cloths
- Appropriate primer
- Portable work lighting
Before purchasing materials, inspect the entire room. This reduces interruptions and helps you choose products suited to the existing surface.
Know When Professional Interior Painting Makes Sense
Professional help can be valuable when walls have extensive damage, difficult stains, high-gloss coatings, textured finishes, or signs of moisture. Tall ceilings, detailed trim, occupied rooms, and tight project schedules can also make professional preparation worthwhile.
Our team at BVL Painting & Carpentry can evaluate wall conditions, identify the necessary preparation, and coordinate the finish with your lighting and interior features. Professional prep may also reduce visible patches, inconsistent sheen, and premature coating failure.
Review how painting flexibility supports different projects or explore a South Salem painting project for additional planning ideas.
Frequently Asked Questions
How do you prepare interior walls for painting?
Clean the walls, inspect and repair damage, sand uneven areas, remove dust, and prime where the surface requires it. Protect nearby floors, trim, fixtures, and furniture before applying paint.
Do you need to wash walls before painting?
Walls should be cleaned when they contain dust, grease, fingerprints, smoke residue, or other contamination. After washing, remove cleaner residue and let the surface dry completely.
Should you sand walls before painting?
Not every wall requires complete sanding. Patched, uneven, glossy, or rough areas generally benefit from sanding. Remove all resulting dust before applying primer or paint.
Can you paint directly over repaired drywall?
New compound and exposed drywall are porous and may absorb paint unevenly. Priming repaired areas helps create more consistent color and sheen.
How long should wall repairs dry before painting?
Drying time depends on the product, repair thickness, humidity, and ventilation. Follow the manufacturer’s directions and confirm that each patch is dry before sanding or priming.
Is primer necessary when repainting the same color?
Not always. A clean, stable wall in a similar color may accept a quality finish coat without full priming. Repairs, stains, bare areas, and glossy surfaces may still need primer.
Need Help Preparing Your Interior Walls?
A lasting finish begins before the paint container is opened. Cleaning, repairs, sanding, selective priming, and careful protection determine how evenly the final coating looks and how well it performs.
If your walls have extensive damage, stains, difficult finishes, or numerous repairs, professional preparation can provide a more consistent foundation. Contact BVL Painting & Carpentry to discuss the condition of your walls and plan an interior painting project suited to your home.