Preparing to transform your living space can feel exciting. However, after stripping wallpaper, walls often look far from ready. Before you paint, you must handle the messy aftermath. Adhesive, tiny holes, and rough patches can quickly spoil a smooth finish.
Still, these issues are fixable with the right steps. Priming helps paint stick and stay bright. Likewise, smoothing rough spots and repairing small damage matters. With careful wall prep after wallpaper, your walls become a clean canvas. So, roll up your sleeves and begin.
Check Your Wall Condition After Removal
After removal, inspect every section closely. In fact, wall prep after wallpaper starts with seeing what changed. Look for torn paper, leftover backing, or glue streaks. Also, feel for bumps and soft spots that hint at drywall trouble.
Next, note nail holes, cracks, and gouges. Then, clear loose debris that can block patching. Since glue hides in corners, check edges carefully. If you find damp areas, let them dry fully. This step supports safer repair walls after wallpaper work.
- Scan under bright light for ridges and dents.
- Mark trouble spots with pencil for quick tracking.
- Check corners where glue often collects.
- Let wet areas dry to avoid peeling later.
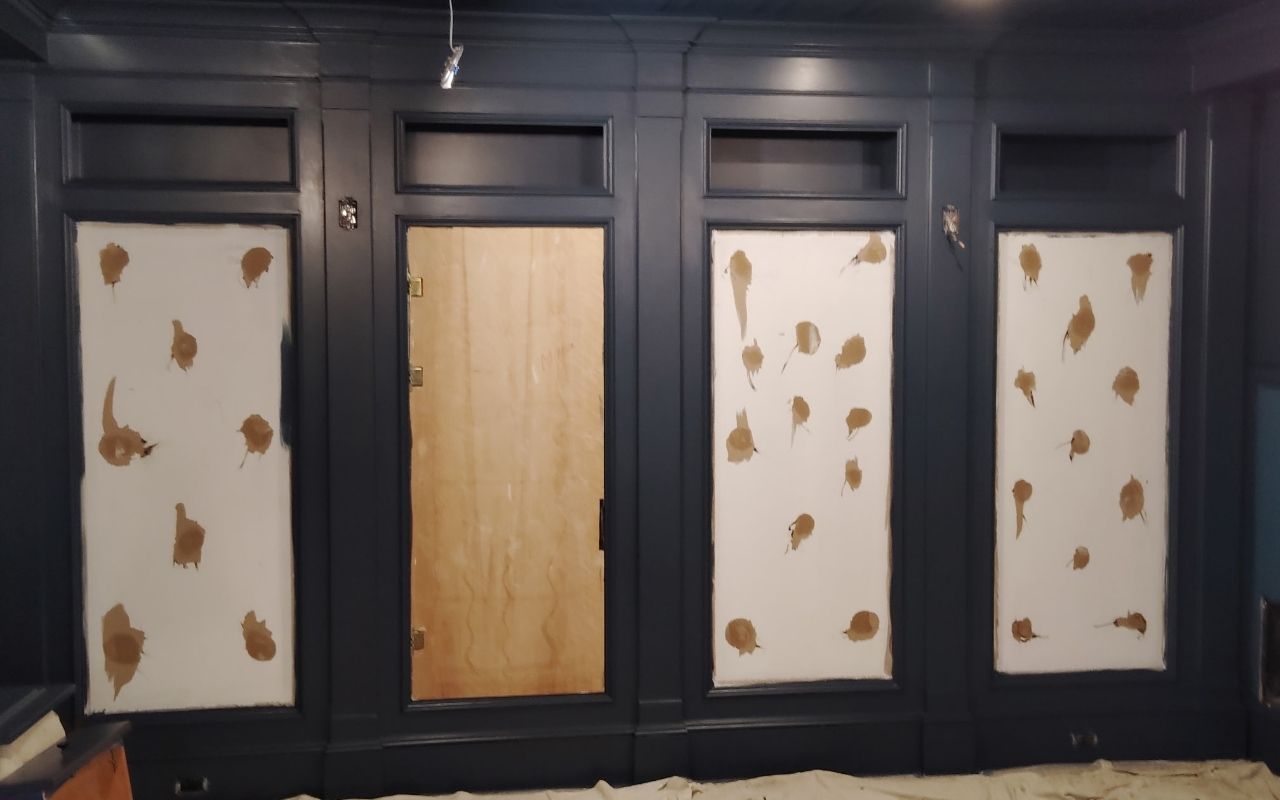
Fill Holes and Fix Surface Damage
Start by choosing the right filler. For small holes, use lightweight spackle. For larger dents, use joint compound instead. Then, press it firmly into the gap and smooth the surface. This part of wall prep after wallpaper makes later steps easier.
Once dry, sand gently. First, use medium grit. After that, switch to fine grit for clean edges. This is key for smoothing walls post removal. Finally, wipe dust away with a damp cloth, so primer bonds well.
- Use a putty knife to spread thin, even layers.
- Sand slowly to avoid low spots.
- Check your work from different angles.
- Repeat patching if shadows reveal dips.
Remove Sticky Glue the Right Way
Glue can linger even after scraping. Therefore, soften it first. Mix warm water with mild soap in a spray bottle. Then, mist the residue and wait five to ten minutes. This simple wallpaper removal prep step helps protect the wall surface.
Next, scrape with a plastic tool at a slight angle. Avoid metal tools, because they can gouge drywall. If residue stays, repeat the mist-and-scrape method. When the wall feels smooth, wipe with clean water. Now, wall prep after wallpaper can move forward.
- Use warm, soapy water to loosen residue.
- Scrape gently in sweeping motions.
- Rinse after cleaning to remove stickiness.
- Run your hand over the wall to confirm it’s tack-free.
Sand for a Smooth, Paint-Ready Finish
Sanding blends patches and removes small bumps. So, begin with medium grit and work in small circles. Keep pressure even, because heavy sanding can create dips. After that, switch to fine grit for a softer feel. This supports priming walls after wallpaper success.
Then, remove all dust. Use a vacuum brush, or wipe with a damp cloth. If dust remains, primer can look uneven. With the wall clean and smooth, you are ready for the next layer in wall prep after wallpaper.
Why Primer Matters Before Painting
Primer is often the difference between “okay” and “great.” It seals patched areas and helps paint cover evenly. Without it, paint can soak in unevenly and look blotchy. Also, primer can block faint stains from old glue.
Since adhesion matters, apply primer on bare drywall and repaired zones. In other words, priming walls after wallpaper makes the topcoat grip better. This step is central to wall prep after wallpaper and supports a longer-lasting finish.
Choose the Best Primer for Your Room
Pick primer based on wall type and room needs. Water-based primer works well on most drywall and cleans up easily. However, oil-based primer can seal stubborn stains better. If the old wallpaper was dark, choose a high-hide primer for cleaner coverage.
Also, check labels for mildew control in damp rooms. That way, bathrooms and kitchens stay fresher. If you want more guidance before you paint, read these interior paint prep tips for homeowners. BVL Painting & Carpentry often recommends matching primer to the space and the wall condition.
Tools and Materials You Should Have Ready
Gather everything before you start. That way, your workflow stays steady. This stage supports wall prep after wallpaper by reducing delays. In addition, it keeps the work area cleaner and safer. BVL Painting & Carpentry suggests setting tools in one spot for quick access.
- Plastic scraper, sponge, bucket, and mild soap
- Spackle or joint compound and putty knives
- Sandpaper (medium and fine) plus a sanding block
- Drop cloths, gloves, goggles, and a dust mask
How to Apply Primer Evenly
Work from the top down. First, roll large areas with light pressure. Then, use a brush for corners and edges. Keep a wet edge, so lap marks do not form. Also, roll in a “W” pattern for smoother coverage.
Let primer dry fully before touching up. Then, check for dull spots and recoat if needed. These steps make priming walls after wallpaper more reliable. If you want help planning your project, BVL Painting & Carpentry can guide your prep choices.
Frequently Asked Questions
How long should I wait before painting after removal?
Wait until the walls are fully dry. Also, let patches and primer cure based on the label directions.
What if glue keeps coming back after cleaning?
Repeat warm-water softening and gentle scraping. Then, rinse well and let the wall dry again.
Do I always need to prime after wallpaper comes off?
Yes, in most cases. Primer helps even out porous spots and improves paint grip for a cleaner finish.
What is the easiest way to repair small nail holes?
Use lightweight spackle, smooth it flat, and sand lightly. Then, prime the repaired area.
When should I replace wallpaper instead of painting?
If the wallpaper is very old or peeling badly, replacement may be smarter. See when to replace old wallpaper at home for helpful signs.
Bring the Room Together with a Clean Finish
When each step is done well, results look better and last longer. Assess damage, clean glue, and smooth repairs. Then, prime carefully for strong adhesion. Wall prep after wallpaper is worth the effort, because it protects your final look.
If you prefer a polished result without the hassle, BVL Painting & Carpentry can help you plan repairs and finishes. For next steps or project support, visit the BVL Painting & Carpentry contact page. Also, explore BVL Painting & Carpentry guidance on your page at BVL Painting & Carpentry’s wallpaper replacement guide.